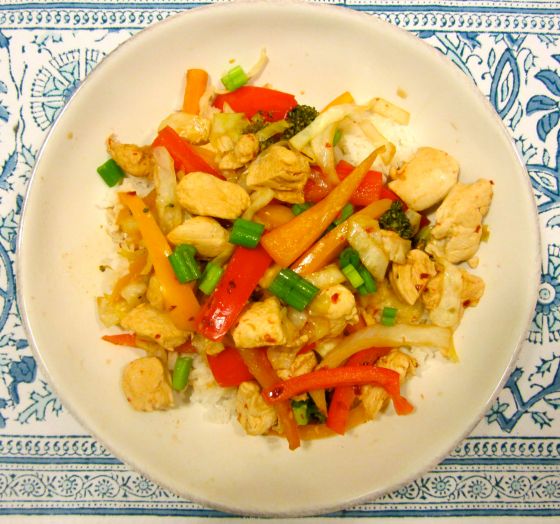
What’s Cooking: Spicy Chicken Stir-Fry

IMG_0550

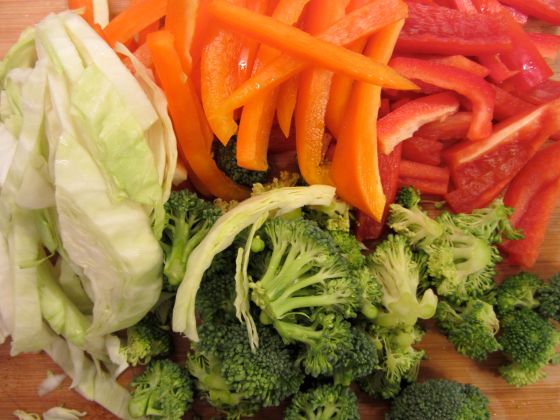
Stir-fry is one of my favorite meals. It’s a great way to get lots of servings of vegetables in one dish, and the flavors are easy to change depending on the spices and sauces used. I also love the fact that once I’m finished chopping, dinner can be on the table in less than 15 minutes. While I’m a big fan of the classic teriyaki chicken, I like this recipe because it has a pretty spicy kick to it. If you’re not a huge fan of spicy foods, you can easily adjust the spiciness by reducing the amount of red pepper you use.

Ingredients

  • 1 lemon, juiced and grated
  • 3 tablespoons reduced-sodium soy sauce
  • 2 tablespoons olive oil
  • 1 pound chicken breast, cut into 1-inch strips
  • 1 small head napa cabbage, sliced into 1/2-inch pieces
  • 1 head broccoli, cut into small florets
  • 1 large red bell pepper, seeded and thinly sliced
  • 1 large orange bell pepper, seeded and thinly sliced
  • 1 teaspoon peeled and finely chopped fresh ginger
  • 1 1/4 teaspoon red pepper flakes
  • 1/4 teaspoon chili powder
  • 2 scallions, thinly sliced
  • sriracha (optional)

Directions

In a small bowl, combine lemon juice and soy sauce; set aside.

In a large wok on medium heat, heat oil. Add chicken and cook for 5 minutes, stirring frequently, until cooked through and no longer pink inside. Add cabbage, broccoli, bell peppers, ginger, pepper flakes and chili powder; cook for 4–5 minutes more, until vegetables are crisp-tender. Add soy sauce mixture and toss. Stir in lemon zest and sprinkle with scallions and sriracha (if desired).

2015-12-14 19.50

I love all the fresh veggies in this dish!

Cheers!

Laura

Holiday Hosting and Raspberry Trifle

2015-11-19 11.40.36

This weekend, we hosted some of our extended family for a Christmas lunch. The first holiday meal I ever hosted was a Christmas gift exchange with my high school girlfriends. Of course, my mom did most of the the planning and grocery shopping, and over the years I’ve learned much more about hosting meals, parties, and tailgates thanks to LOTS of advice from my mom and LOTS of trial and mostly error.

I’m by no means an expert, but here are the key tips I’ve learned from hosting – whether it is a smaller dinner party or a large bash.

  1. Keep the menu simple: I like to plan my menu around food that I’ve made several times before. This way, I know the food will taste good, and I won’t have a melt down minutes before guests arrive since it’s harder to botch a familiar recipe.
  2. Do as much work ahead of time as possible: Two nights before the event, I created my tablescape, set out my serving dishes, washed the holiday china, and prepared any food that I could get a head start on. The day before, I cleaned the house (minus the kitchen). This meant that on Sunday morning, I was only responsible for popping a couple of dishes in the oven, doing a light spot cleaning and vacuuming, and putting final touches on everything.  
  3. Delegate tasks if it makes sense: Since this was a smaller family gathering, I didn’t feel bad asking people to contribute. My brother-in-law brought the wine and each couple brought a side dish. Generally guests want to bring something or help in some way, so if the situation is appropriate, I encourage it and give them a guideline, such as, “It would be great if you could bring a salad.” Then I know that I don’t need to prepare a salad, and the generous guest knows they won’t be duplicating a menu item I’ve already made. Being fairly general also gives them autonomy to put their personal spin on the dish.

Here’s the menu I planned for our Christmas lunch:

Appetizer: Beaten biscuits with country ham

Main: Beef tenderloin, salad (brought by guest), green vegetable (brought by guest), mashed potatoes, and rolls

Dessert: Raspberry trifle, assorted homemade Christmas candy

Raspberry Trifle Recipe

This is the same dessert I made for my girlfriends in high school. It is a go-to recipe because it looks pretty and festive,  is easy to assemble several hours before guests arrive, and is practically no-fail.

  • 1 1/2 cups heavy cream
  • 1/4 cup white sugar
  • 2 (8 ounce) packages cream cheese, softened
  • 2 teaspoons lemon juice
  • 1 1/2 teaspoons vanilla extract
  • 1/2 cup white sugar
  • 1 (10.75 ounce) package prepared pound cake*
  • 2 (10 ounce) packages frozen raspberries, thawed**
  • 2 tablespoons unsweetened cocoa powder, for dusting
  1. In a medium bowl, beat cream with 1/4 cup sugar until stiff peaks form. In another bowl, cream together cream cheese, lemon juice, vanilla and 1/2 cup sugar. Fold 2 cups of whipped cream into cream cheese mixture. Reserve remaining whipped cream.
  2. Slice pound cake into 18 – 1/2 inch slices. Drain raspberries, reserving juice. Line the bottom of a 3 quart glass bowl or trifle bowl with one-third of the cake slices. Drizzle with some raspberry juice. Spread one-fourth of the cream cheese mixture over cake. Sift one-fourth of the cocoa over that. Sprinkle with one-third of the raspberries. Repeat layers twice. Top with remaining cream cheese mixture, whipped cream and sifted cocoa. Cover and refrigerate 4 hours before serving.

*I love to bake, and I would normally make a homemade pound cake if I was serving a more simple dessert, such as pound cake with fresh berries. However, since I had a busy weekend and the trifle had plenty of flavorful ingredients, a Sara Lee pound cake from frozen foods aisle worked great.

**I bought a 26 ounce bag of frozen raspberries because it was a better deal at the grocery store and ended up using the entire bag. If you and your guests like raspberries, you may want to use a few more than the original recipe suggests.

I hope you’re enjoying your holiday festivities!

Cheers!

Laura
Lunchtime Quinoa Bowl

2015-10-29 19.12.41

Confession: I’ve been getting off track with lunch recently. I am fortunate to live about a mile from work, so I frequently walk home during my lunch hour to let the dog out and grab a quick bite. It’s really ideal because I’m able to get a few steps in, take a mental break from the office, and enjoy some doggy snuggles.

However, I used to be the best at packing well balanced and filling lunches when I took my lunch to work and had to plan ahead. Now, I tend to grab just whatever is quick – some cheese and crackers, a can of tuna, a pear, some pretzels dipped in peanut butter, a cookie, whatever… I usually returned to the office feeling gross and bloated or still hungry and on the prowl for unhealthy snacks. Last week, I purchased frozen chicken nuggets and corn dogs at the grocery store because I thought that would be a great option for my grab-and-go lunches. What was I thinking?! After reaching that low point, I realized enough is enough. It is time to get back on track!

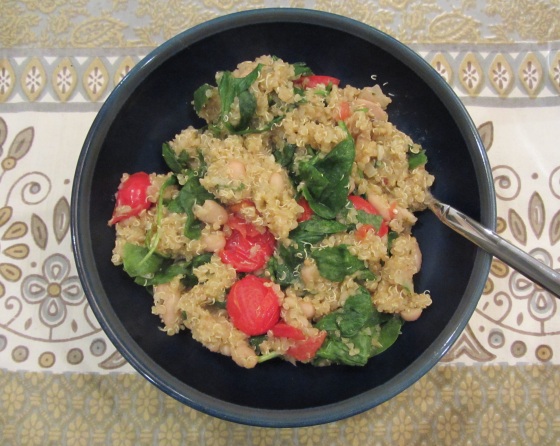
When I was single, I used to frequently make hearty quinoa bowls for dinner and then eat the leftovers for lunch. On Sunday, I decided to whip up a big batch and use it for at least three of my lunches this week. The great thing about quinoa bowls is they’re hard to mess up. Sometimes I follow a recipe, but more often than not,  I just chop up whatever veggies and herbs I have on hand and add some good olive oil, vinegar, sea salt, and pepper for a little flavor. However, this time I used a recipe I found at Kaylee Cooks.

Tomato-Basil Quinoa with Spinach and White Beans

Ingredients:

  • 1 cup dry quinoa, rinsed
  • 3 cups vegetable broth(note, this is more than you usually need to cook 1 c of quinoa, but we are also cooking the tomatoes and beans in the broth)
  • 2 cloves garlic, minced
  • 1 small onion, chopped
  • 1 cup cherry tomatoes, halved
  • 8 oz canned white beans, rinsed and drained
  • 1.5 tbsp basil
  • Salt and pepper to taste
  • 4 oz fresh baby spinach

Directions:

  1. Combine quinoa and broth in a pot and bring to a boil. Reduce to a simmer.
  2. Meanwhile, heat olive oil in a large dutch oven (or other large pan) over medium heat.
  3. Add garlic and onions; cook for 1 minute (until the onion is softened)
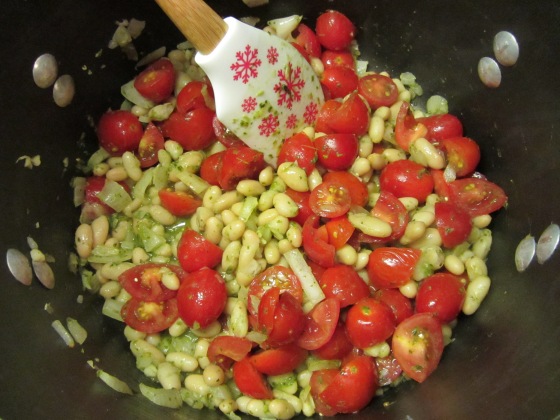
  4. Add tomatoes, beans and basil and cook for 3-4 minutes.
  5. Pour the pot of quinoa and broth into the tomato mixture, season and simmer on a low heat (uncovered) until the quinoa is absorbs the broth and is cooked through (You may need to add a bit more broth to finish cooking the quinoa if the broth is absorbing too quickly).
  6. Once the quinoa has finished cooking, add the spinach and stir to wilt.
2015-10-29 18.14.30

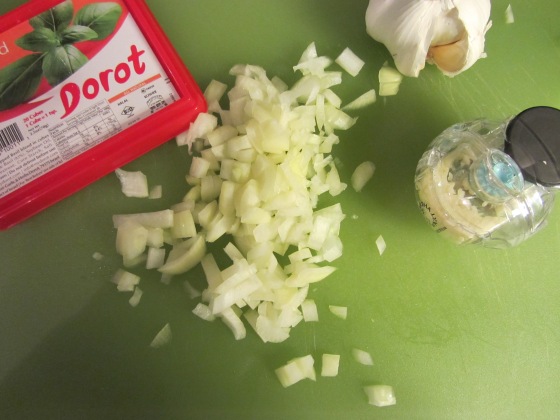
When I don’t have fresh basil in the winter, I like to use the Dorot frozen basil cubes. Locally, they can be found at Trader Joe’s, Good Foods Co-Op, and Rainbow Blossom Natural Foods Market.

2015-10-29 18.40.23

I’d love to hear your easy, go-to lunch ideas!

Cheers!

Laura

Dried Herbs

thyme

For my birthday earlier this year, my dad built me a raised herb garden made of cedar wood. During the summer and fall, I love to use lots of herbs when I cook, so it was a great gift. Besides the dill that I may have pruned too much, all of the herbs took off, and most thrived until the late fall. With temperatures in Kentucky dropping well under freezing over the weekend, I decided it was time to harvest what was left.

I’ve been known to make huge batches of pesto to make use of overgrown basil and freeze herbs in ice trays before, but I’ve never dried them. This year we had so many that I didn’t want to waste, so I decided to dry them. If everything turns out well, I may put them in cute packages and use them as stocking-stuffers for friends and family who enjoy cooking.

After researching the best methods to dry them, I decided to go with the classic air-drying method. Some guides I read suggested drying the herbs in the oven, but I didn’t want to risk the chance of burning them. While the air drying method may take a couple weeks, it’s much harder to ruin the herbs.

All I did was gather the herbs in bunches. You can use rubber bands or wire. I went with rubber bands because as the herbs dry, they shrink and can fall out of the wrapped wire.

oregano bunch

Then I cut slits around the corners of paper bags to allow for a little bit of airflow before bunching the paper bags around the bunches of herbs. Again, I used rubber bands to secure the paper bags.

herb bagThe placemats are Pomegranate – one of my favorite Lexington brands. A similar pattern is linked here.

I hung the herb bundles from rafters in the attic where we have a dehumidifier. Ideally, you should hang the herbs in a cool, dry area for a couple of weeks.

I’m excited to begin using the finished product in some new recipes!

Do you have any good winter recipes that call for dried herbs?

Cheers!
Laura