Oven BBQ Chicken

In this family, we love The Pioneer Woman (Laura’s already mentioned her here). She has down-to-earth style, and her food reminds me of things that my mom would cook, a.k.a. the best food. Compared to the other Newton women, I’m still a novice in the kitchen, but anytime I feel like experimenting with a recipe, The Pioneer Woman is one of my first stops.

With all the snowy weather lately, I’ve exhausted my repertoire of soups and chili, and I’ve found myself craving something different. That’s when I stumbled upon this recipe. Because I live in an industrial loft and a grill is pretty much out of the question, I was immediately excited by a recipe that would allow me to get a taste of a traditionally barbecued food that isn’t just your standard baked chicken.

IMG_6234 (2)

“Drop anything for me, Mom?” – Lou

Ingredients

  • 3 Cups BBQ Sauce
  • 1/2 Cup Peach Preserves
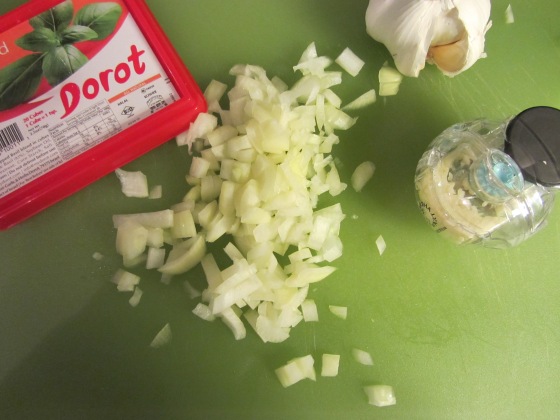
  • 1 Clove Garlic
  • Hot Sauce, optional
  • 12 Whole Chicken Thighs, skin-on
  • Olive Oil for Brushing

Directions

Preheat your oven to 400 degrees. While preheating, brush a rimmed baking sheet with olive oil and place your chicken thighs skin side down (I only made 6, not 12). Let them roast for 25 minutes. While roasting, go ahead and prepare your sauce. If you’re in a hurry or want to keep things simple, you could just use your favorite BBQ sauce from the grocery store. I took The Pioneer Woman’s advice, however, and warmed some honey BBQ sauce on the stove for about 10 minutes while adding a heaping spoonful of peach preserves and 1 clove of garlic minced.

IMG_6235 (2)

You need this garlic roller. Perfectly minced garlic every time!


After the 25 minutes is up, remove your chicken thighs and brush them with your BBQ sauce. Then flip them so that they are skin side up, and brush with sauce on that side too. Then, let them continue roasting for three 7 minute intervals. Between each interval, remove and brush with sauce again. For the third set of 7 minutes, bump your heat to 425 to get a little char on the edges.
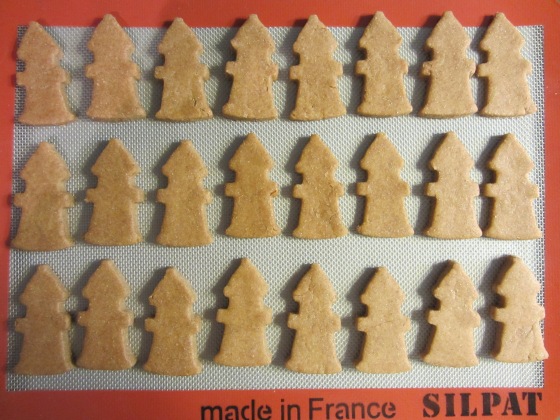
 

IMG_6237

Yummmm.

This recipe was Ryan tasted and approved–seriously, it was so good. This will be a repeat recipe in the future. I was a little hesitant putting the sauce on the first time not knowing how much it would need, and I wouldn’t hold back so much next time. Another thing I would do differently is mix up the cuts of meat. Chicken thighs are good, but not my favorite. I would probably do a mixture of thighs and legs and maybe even a few petite breasts. I also didn’t use bone-in thighs as suggested in the recipe, and I honestly think the ease of being able to eat them boneless made them better.

Cheers!

Sarah

Weekend Recap

If you reside in the Bluegrass or really anywhere in the Upper-South/Mid-Atlantic region, then you were probably snowed in for much of the weekend like we were. During January and February, I relish snow days and think they are good for the soul. They force people to slow down and take some time to rest from the normal bustle of life. However, by March, I definitely have spring fever and am ready to be outside without having to bundle up.

Other than heading out for the UK vs. Vanderbilt basketball game on Saturday, we spent much of the weekend playing in the snow, curled up with hot beverages and books, and eating comfort food.

On Friday, I was so tempted to make a big batch of chocolate chip cookies, but I satisfied my baking bug by making this honey wheat bread. However, by Sunday, I couldn’t hold out any longer and just made some cookies. I also made a big batch of The Pioneer Woman’s potato soup that we’re still enjoying. I substituted milk for half of the heavy cream in the recipe, and I think it still tastes decadent.

Here are some scenes I snapped of our weekend:

IMG_0117

Where did all the squirrels go?

IMG_0118

We did a lot of this after playing in the snow.

IMG_0121

The view from our front porch. Jay won the neighborhood superlative for best shoveled sidewalks.

IMG_0115

Spent some time planning a girls’ trip to New England this summer. I’m most excited to visit Maine!

We also stopped by the Bluegrass Barkery this weekend to pick up some of these Pawz booties and a few treats. After a light snow last Wednesday and the snowstorm this weekend, the pads on the bottom of her paws were getting red and irritated from the ice and salt. These little booties were great to put on her before walks and playing in the snow. She normally doesn’t like wearing anything, but she tolerated these better than I anticipated. The booties are reusable and disposable, so they come in packs of 12. Annabelle wore the same booties for several days, and they are still in good shape. The pack will definitely last all winter and possibly even into next winter. If you have a dog that you walk frequently, I definitely recommend these booties!


I hope you’re well rested and ready to take on the week! Cheers!

Laura

What’s Cooking: Spicy Chicken Stir-Fry

IMG_0550

Stir-fry is one of my favorite meals. It’s a great way to get lots of servings of vegetables in one dish, and the flavors are easy to change depending on the spices and sauces used. I also love the fact that once I’m finished chopping, dinner can be on the table in less than 15 minutes. While I’m a big fan of the classic teriyaki chicken, I like this recipe because it has a pretty spicy kick to it. If you’re not a huge fan of spicy foods, you can easily adjust the spiciness by reducing the amount of red pepper you use.

Ingredients

  • 1 lemon, juiced and grated
  • 3 tablespoons reduced-sodium soy sauce
  • 2 tablespoons olive oil
  • 1 pound chicken breast, cut into 1-inch strips
  • 1 small head napa cabbage, sliced into 1/2-inch pieces
  • 1 head broccoli, cut into small florets
  • 1 large red bell pepper, seeded and thinly sliced
  • 1 large orange bell pepper, seeded and thinly sliced
  • 1 teaspoon peeled and finely chopped fresh ginger
  • 1 1/4 teaspoon red pepper flakes
  • 1/4 teaspoon chili powder
  • 2 scallions, thinly sliced
  • sriracha (optional)

Directions

In a small bowl, combine lemon juice and soy sauce; set aside.

In a large wok on medium heat, heat oil. Add chicken and cook for 5 minutes, stirring frequently, until cooked through and no longer pink inside. Add cabbage, broccoli, bell peppers, ginger, pepper flakes and chili powder; cook for 4–5 minutes more, until vegetables are crisp-tender. Add soy sauce mixture and toss. Stir in lemon zest and sprinkle with scallions and sriracha (if desired).

2015-12-14 19.50

I love all the fresh veggies in this dish!

Cheers!

Laura

Friday Favorites

Hello WeekendDid anyone else FINALLY feel back in the swing of things this week? It’s not a bad feeling, and coupled with a three-day weekend ahead, it’s a really awesome feeling! Here are a few things that caught our eye this week!

  • Almond Crusted Chicken Nuggets – Since this week has been fairly quiet most evenings, I’ve been a bit more adventurous in the kitchen. I’ve enjoyed trying some new dishes and flavors, but I’m also craving some comfort food. I saw this recipe on one of my favorite food blogs and am planning to make these next week.
  • Bikini Body – I’m really proud that this awesome lady is a fellow Kentuckian. As women, I think it is important to take care of our bodies and appreciate them for everything they allow us to do. Whenever I look in the mirror and think my butt is too big or my calves are too muscular, I try to turn my thoughts to gratitude for my ability to walk and run and do all of the other things I love doing.
  • These Booties – I’ve been eyeing these booties since September and tried to hold out until they went on sale – but that never happened! I broke down and ordered them earlier this week and have been wearing them nonstop since they arrived. I ordered them in the “putty” color, but if you like them in navy, I found them on sale on Abercrombie’s website of all places. *Disclaimer: They’d probably smell like the cologne your high school boyfriend doused himself in everyday. Anyways, I’m officially on the booties bandwagon (3 years after everyone else…)!
  • Oh You Steppin’ – The health and wellness program where I work offered super discounted Fitbits for employees who sign up for a step-counting challenge, so as someone on the fence about the Fitbit craze, this was enough to push me over the edge. I’m one of the worst users ever because I don’t really like wearing the thing (honestly, it makes for a less cute arm party), so I usually take it off after I reach my 10,000 steps. While it’s amusing to see people marching around and swinging their arms for the sake of a few steps and free swag, if it makes people more conscientious about staying healthy, then I’m a supporter!
arm party

3,097 steps and a shameless arm party pic at work

Whether you’re staying in for the weekend or taking advantage of an extra day to squeeze in a quick trip, some of our posts earlier this week have you covered. Check out Sarah’s favorite new releases and my favorite podcasts.

Cheers and Happy Friday!

Laura

Weekend Roundup and What’s Cooking!

Happy Monday! On Mondays, Sarah or I normally share a weekend recap. However, this past weekend was pretty uneventful, which is A-OK with this lady. On Friday evening, I was planning to head to the gym, but I got a better offer I couldn’t refuse (AKA happy hour with a girlfriend). Then, Jay and I volunteered for Room In The Inn at our church later that night. I spent the rest of the weekend tackling housework, stretching it out at yoga, and snuggling with my pup.

Since that makes for a pretty boring blog post, I thought I’d share a couple of quick and easy recipes I made for EVERY member of the family to enjoy throughout the week.

Sweets are my ultimate weakness, so while I’m trying to cut back on sweet treats after the holidays, going cold turkey just isn’t realistic. These are healthier than a normal cookie, easy to whip up, gluten-free, and still satisfy my sweet tooth.

No-Bake Energy Bites

  • 1 cup rolled oats
  • 1/2 cup dark chocolate chips (or you could substitute a different chip, M&Ms, or raisins)
  • 1/2 cup ground flax seed
  • 1/2 cup almond butter
  • 1/3 cup honey
  • 1 teaspoon vanilla extract

IMG_0543

Combine oats, chocolate chips, flax seed, almond butter, honey, and vanilla extract together in a bowl; form into balls using your hands. Arrange energy bites on a baking sheet and freeze until set, about 1 hour.

IMG_0546

Like I mentioned, I made treats for the whole family. I found this recipe for dog treats while perusing Pinterest the other day and had all of the ingredients on hand. Annabelle is the first dog I’ve had that isn’t very motivated by food, but she LOVES homemade treats. Her favorites are the cookies from the Bluegrass Barkery, and it is safe to say that she likes these pretty well too!

Peanut Butter Dog Treats (via Damn Delicious)

2015-12-10 16.59.08

  • 2/3 cup pumpkin puree
  • 1/4 cup peanut butter
  • 2 large eggs
  • 3 cups whole wheat flour, or more, as needed
  1. Preheat oven to 350 degrees F. Line a baking sheet with parchment paper or a silicone baking mat; set aside.
  2. In the bowl of an electric mixer fitted, beat pumpkin puree, peanut butter and eggs on medium-high until well combined, about 1-2 minutes. Gradually add 2 1/2 cups flour at low speed, beating just until incorporated. Add an additional 1/4 cup flour at a time just until the dough is no longer sticky.
  3. Working on a lightly floured surface, knead the dough 3-4 times until it comes together. Using a rolling pin, roll the dough to 1/4-inch thickness. Using cookie cutters, cut out desired shapes and place onto the prepared baking sheet.
  4. Place into oven and bake until the edges are golden brown, about 20-25 minutes.
  5. Let cool completely.

2015-12-10 17.05.11

One thing I have to admit is that I bought a new cookie cutter for these dog treats. I only have holiday-themed and round cookie cutters, so I stopped by Williams-Sonoma to see what fun shape I could find. I decided on the fire hydrant. How cute is that?! They are out of stock online, but they had plenty at my local store. My mom is probably rolling her eyes – I know it’s ridiculous…

Cheers to a great week ahead!

Laura

Holiday Hosting and Raspberry Trifle

2015-11-19 11.40.36

This weekend, we hosted some of our extended family for a Christmas lunch. The first holiday meal I ever hosted was a Christmas gift exchange with my high school girlfriends. Of course, my mom did most of the the planning and grocery shopping, and over the years I’ve learned much more about hosting meals, parties, and tailgates thanks to LOTS of advice from my mom and LOTS of trial and mostly error.

I’m by no means an expert, but here are the key tips I’ve learned from hosting – whether it is a smaller dinner party or a large bash.

  1. Keep the menu simple: I like to plan my menu around food that I’ve made several times before. This way, I know the food will taste good, and I won’t have a melt down minutes before guests arrive since it’s harder to botch a familiar recipe.
  2. Do as much work ahead of time as possible: Two nights before the event, I created my tablescape, set out my serving dishes, washed the holiday china, and prepared any food that I could get a head start on. The day before, I cleaned the house (minus the kitchen). This meant that on Sunday morning, I was only responsible for popping a couple of dishes in the oven, doing a light spot cleaning and vacuuming, and putting final touches on everything.  
  3. Delegate tasks if it makes sense: Since this was a smaller family gathering, I didn’t feel bad asking people to contribute. My brother-in-law brought the wine and each couple brought a side dish. Generally guests want to bring something or help in some way, so if the situation is appropriate, I encourage it and give them a guideline, such as, “It would be great if you could bring a salad.” Then I know that I don’t need to prepare a salad, and the generous guest knows they won’t be duplicating a menu item I’ve already made. Being fairly general also gives them autonomy to put their personal spin on the dish.

Here’s the menu I planned for our Christmas lunch:

Appetizer: Beaten biscuits with country ham

Main: Beef tenderloin, salad (brought by guest), green vegetable (brought by guest), mashed potatoes, and rolls

Dessert: Raspberry trifle, assorted homemade Christmas candy

Raspberry Trifle Recipe

This is the same dessert I made for my girlfriends in high school. It is a go-to recipe because it looks pretty and festive,  is easy to assemble several hours before guests arrive, and is practically no-fail.

  • 1 1/2 cups heavy cream
  • 1/4 cup white sugar
  • 2 (8 ounce) packages cream cheese, softened
  • 2 teaspoons lemon juice
  • 1 1/2 teaspoons vanilla extract
  • 1/2 cup white sugar
  • 1 (10.75 ounce) package prepared pound cake*
  • 2 (10 ounce) packages frozen raspberries, thawed**
  • 2 tablespoons unsweetened cocoa powder, for dusting
  1. In a medium bowl, beat cream with 1/4 cup sugar until stiff peaks form. In another bowl, cream together cream cheese, lemon juice, vanilla and 1/2 cup sugar. Fold 2 cups of whipped cream into cream cheese mixture. Reserve remaining whipped cream.
  2. Slice pound cake into 18 – 1/2 inch slices. Drain raspberries, reserving juice. Line the bottom of a 3 quart glass bowl or trifle bowl with one-third of the cake slices. Drizzle with some raspberry juice. Spread one-fourth of the cream cheese mixture over cake. Sift one-fourth of the cocoa over that. Sprinkle with one-third of the raspberries. Repeat layers twice. Top with remaining cream cheese mixture, whipped cream and sifted cocoa. Cover and refrigerate 4 hours before serving.

*I love to bake, and I would normally make a homemade pound cake if I was serving a more simple dessert, such as pound cake with fresh berries. However, since I had a busy weekend and the trifle had plenty of flavorful ingredients, a Sara Lee pound cake from frozen foods aisle worked great.

**I bought a 26 ounce bag of frozen raspberries because it was a better deal at the grocery store and ended up using the entire bag. If you and your guests like raspberries, you may want to use a few more than the original recipe suggests.

I hope you’re enjoying your holiday festivities!

Cheers!

Laura

Lunchtime Quinoa Bowl

2015-10-29 19.12.41

Confession: I’ve been getting off track with lunch recently. I am fortunate to live about a mile from work, so I frequently walk home during my lunch hour to let the dog out and grab a quick bite. It’s really ideal because I’m able to get a few steps in, take a mental break from the office, and enjoy some doggy snuggles.

However, I used to be the best at packing well balanced and filling lunches when I took my lunch to work and had to plan ahead. Now, I tend to grab just whatever is quick – some cheese and crackers, a can of tuna, a pear, some pretzels dipped in peanut butter, a cookie, whatever… I usually returned to the office feeling gross and bloated or still hungry and on the prowl for unhealthy snacks. Last week, I purchased frozen chicken nuggets and corn dogs at the grocery store because I thought that would be a great option for my grab-and-go lunches. What was I thinking?! After reaching that low point, I realized enough is enough. It is time to get back on track!

When I was single, I used to frequently make hearty quinoa bowls for dinner and then eat the leftovers for lunch. On Sunday, I decided to whip up a big batch and use it for at least three of my lunches this week. The great thing about quinoa bowls is they’re hard to mess up. Sometimes I follow a recipe, but more often than not,  I just chop up whatever veggies and herbs I have on hand and add some good olive oil, vinegar, sea salt, and pepper for a little flavor. However, this time I used a recipe I found at Kaylee Cooks.

Tomato-Basil Quinoa with Spinach and White Beans

Ingredients:

  • 1 cup dry quinoa, rinsed
  • 3 cups vegetable broth(note, this is more than you usually need to cook 1 c of quinoa, but we are also cooking the tomatoes and beans in the broth)
  • 2 cloves garlic, minced
  • 1 small onion, chopped
  • 1 cup cherry tomatoes, halved
  • 8 oz canned white beans, rinsed and drained
  • 1.5 tbsp basil
  • Salt and pepper to taste
  • 4 oz fresh baby spinach

Directions:

  1. Combine quinoa and broth in a pot and bring to a boil. Reduce to a simmer.
  2. Meanwhile, heat olive oil in a large dutch oven (or other large pan) over medium heat.
  3. Add garlic and onions; cook for 1 minute (until the onion is softened)
  4. Add tomatoes, beans and basil and cook for 3-4 minutes.
  5. Pour the pot of quinoa and broth into the tomato mixture, season and simmer on a low heat (uncovered) until the quinoa is absorbs the broth and is cooked through (You may need to add a bit more broth to finish cooking the quinoa if the broth is absorbing too quickly).
  6. Once the quinoa has finished cooking, add the spinach and stir to wilt.
2015-10-29 18.14.30

When I don’t have fresh basil in the winter, I like to use the Dorot frozen basil cubes. Locally, they can be found at Trader Joe’s, Good Foods Co-Op, and Rainbow Blossom Natural Foods Market.

2015-10-29 18.40.23

I’d love to hear your easy, go-to lunch ideas!

Cheers!

Laura